This document explains how to enable an app for AI Agent Studio. You can create a new app or add actions.json and callbacks to an existing custom app.
For concepts, supported subscriptions, and publishing scope, see AI Actions overview.
Choose your pathThis document covers every file you might need for AI Actions. You do not need to read every section. Follow the path that matches your app and integration pattern.
Starting point
- New app: Run fdk create and select a template.
- Existing custom app: Add actions.json and callbacks in server.js to your app. You can extend apps that already include a front-end app folder.
Integration pattern
- Server-side logic only: Work through actions.json, callbacks, test data, local testing, and publish. Skip installation parameters and OAuth and request templates.
- External HTTP calls: Work through all sections, including installation parameters or OAuth and request templates.
Prerequisites
Before you start, make sure you have:
- Freshworks CLI (FDK) 10.x installed
- Access to a supported subscription listed in AI Actions overview
- A working app. If you do not have an existing app, create a new one using the fdk create command. For more information, see Create an app.
App structure
A typical AI Actions app contains the following files:
app-root/
├── actions.json
├── manifest.json
├── server/
│   ├── server.js
│   └── test_data/
│       └── <actionName>.json
└── config/
    ├── iparams.json          (optional)
    ├── oauth_config.json     (optional)
└── requests.json (optional)config/iparams.json, config/oauth_config.json, and config/requests.json are optional. Add only the files your actions need.
Configure manifest
Open manifest.json and declare at least one product module in addition to common. If you use request templates, register every template you invoke from server.js under modules.common.requests.
If you are extending an existing custom app, update manifest.json only when you add product modules or register new request templates.
{
  "platform-version": "<platform-version>",
  "modules": {
    "common": {
      "requests": {
        "<requestTemplateName>": {}
      }
    },
    "<product_module>": {}
  },
  "engines": {
    "node": "<node-version>",
    "fdk": "<fdk-version>"
  }
}
Replace the module names with the product modules where you plan to install the app. For example, include support_ticket for Freshdesk Omni, chat_conversation for Freshchat, and service_ticket for Freshservice.
Ensure manifest.json specifies "platform-version": "3.0" or "3.1", FDK 10.x, and Node.js 24.x in engines.
For the full manifest reference, see Configure app manifest.
Note:You can add AI Actions to a new app or extend an existing custom app that already includes UI placeholders in an app folder. A front-end app folder is not required for AI Actions alone.
Configure actions
To configure the actions that appear in AI Agent Studio:
- Add actions.json in the app root directory.
- Define each action using the format in the tabs on the right pane.
The <actionKey> object defines one action.
Action object fields
- <actionKey>object
Unique identifier for the action. Ensure that the key matches the exported callback in server/server.js.
- display_namestring
User-facing label for the action. Appears in the action list under your app name in AI Agent Studio.
- descriptionstring
Help text that explains when to use the action. Appears in the action configuration UI.
- parametersobject
Flat JSON Schema for action inputs. Keep request parameters flat. Do not nest objects in the request schema.
- $schemastring
JSON Schema version for the parameters object. Use http://json-schema.org/draft-07/schema#.
- typestring
Data type of the parameters object. Set this value to object.
- propertiesobject
Action input fields. Each key is a parameter name passed to the callback in server/server.js.
- <parameterName>object
One action input field.
- typestring
Data type of the parameter. Supported values: string, number, integer, or boolean.
- descriptionstring
Help text for workflow admins. Appears in Inputs used when admins map workflow data to the action.
- requiredarray of strings
List of parameter names that the action requires at runtime.
- responseobject
JSON Schema for fields the callback returns. Response schemas can include nested objects.
- typestring
Data type of the response object. Set this value to object.
- propertiesobject
Fields returned by the callback. Appear in Outputs from the API when admins define outputs.
- <fieldName>string | number | integer | boolean | object
One field in the action response.
- additionalPropertiesboolean
When true, allows fields not listed in properties. Set to true if your callback may return fields beyond those you document.
When a workflow admin configures an API action block in AI Agent Studio, your app appears under Your apps and each action appears by its display_name value.
Your app name in Your apps comes from the name you enter during custom app upload. It is not defined in actions.json.
Notes:- Action keys are case-sensitive and need to match exported callback names in server/server.js exactly.
- Exported callback names can be 2 to 40 characters, use letters, numbers, and underscores, and cannot start with a number.
- Write display_name, description, and parameter description values for workflow admins.
- Return only response fields admins need in later workflow steps.
Name alignment checklist
| Artifact | Align with |
|---|---|
| actions.json action key | Exported callback in server/server.js |
| server/test_data/<actionName>.json filename | actions.json action key |
| Request template name in config/requests.json (when used) | Key under manifest.json > modules.common.requests |
| Template name in server.js (when used) | Name passed to $request.invokeTemplate('...') |
Configure installation parameters and OAuth (Optional)
Create config/iparams.json if your app collects integration details or credentials at install time. To authorize access to a third-party service, use installation parameters, OAuth (config/oauth_config.json), or both. Skip this section if your callbacks do not need settings from the admin at install time.
Define iparams or OAuth configuration before you write request templates that reference <%= iparam.<name> %> placeholders or OAuth-enabled request options.
{
  "<iparamName>": {
    "display_name": "<label shown at installation>",
    "description": "<help text for the admin>",
    "type": "text",
    "required": true,
    "secure": false
  }
}- Use "secure": true for secrets such as API keys and private keys.
- Read iparam values in callbacks from payload.iparams.
- Do not hardcode credentials in server.js.
For more information, see Configure app settings and OAuth implementation.
Configure request templates (Optional)
Create config/requests.json only when your callbacks need to call external APIs. Define outbound API calls in request templates, register each template name in manifest.json, and invoke templates from server.js with $request.invokeTemplate. Do not call third-party APIs directly from server.js.
You can skip this section if your callbacks run entirely within server.js without external HTTP calls.
{
  "<requestTemplateName>": {
    "schema": {
      "protocol": "https",
      "method": "<HTTP method>",
      "host": "<%= iparam.<iparamName> %>",
      "path": "<%= context.<placeholder> %>",
      "headers": {
        "<headerName>": "<header value or template>"
      }
    }
  }
}
For OAuth-enabled templates and advanced options, see Request method and OAuth implementation.
Configure callbacks
When a workflow runs an action, the platform invokes the matching callback in server.js with the action payload and installation settings from iparams or OAuth.
To configure callbacks for the actions defined in actions.json:
- Navigate to server/server.js.
- In the exports block, define one async callback for each action key. Use the same name as the action key.
- Implement your action logic in the callback. Use $request.invokeTemplate when you need to call an external API through a request template. Use renderData() to return success or failure responses.
exports = {
  <actionKey>: async function (payload) {
    try {
      const { response } = await $request.invokeTemplate('<requestTemplateName>', {
        context: { /* template placeholders */ }
      });
      renderData(null, JSON.parse(response));
    } catch (error) {
      renderData({ status: error.status || 500, message: error.message });
    }
  }
};
Use renderData(null, data) for success responses and renderData({ status, message }) for failures. If the callback does not return a response, an app execution timeout error occurs.
Callbacks are not limited to external API calls. You can run any server-side logic in a callback, such as transforming data, calling Freshworks APIs through the Request method, or coordinating multiple steps before you return a response. The Logic only sample tab shows a callback that returns a response without calling $request.invokeTemplate.
For the callback contract, see Implement server method invocation and Routing automation callbacks.
Optional: OAuth and npm dependenciesIf your integration uses OAuth, configure config/oauth_config.json and reference the OAuth configuration in request templates. For OAuth client-credentials with JWT signing, add helper functions and list npm packages under dependencies in manifest.json. For OAuth patterns, see OAuth implementation and key-value storage for token caching.
Add test data
Create one JSON file per action at server/test_data/<actionName>.json. Each file contains action input fields only. Configure test iparams or OAuth settings separately in the FDK local testing UI when you use config/iparams.json or config/oauth_config.json.
{
  "<parameterName>": "<sample value>"
}
Test
Notes:- To test the serverless app, use the latest version of Chrome.
- Ensure that the JSON files that contain sample payloads to test actions are available at <app's root directory>/server/test_data.
- If you configured iparams or OAuth, enter test values at http://localhost:10001/custom_configs before you simulate actions.
To simulate an action and test your app:
From the command line, navigate to the directory that contains the app files and run the following command:
fdk run(Optional) If the FDK prompts for system settings, open http://localhost:10001/system_settings, select the modules you configured in manifest.json, enter valid account URLs, and click Continue.
(Optional) If you configured iparams or OAuth, open http://localhost:10001/custom_configs, enter test values, and click Install.
In the address bar of the browser, enter https://localhost:10001/web/test.
From the Select type drop-down list, select actions. The Select an action drop-down list displays all actions configured in server.js.
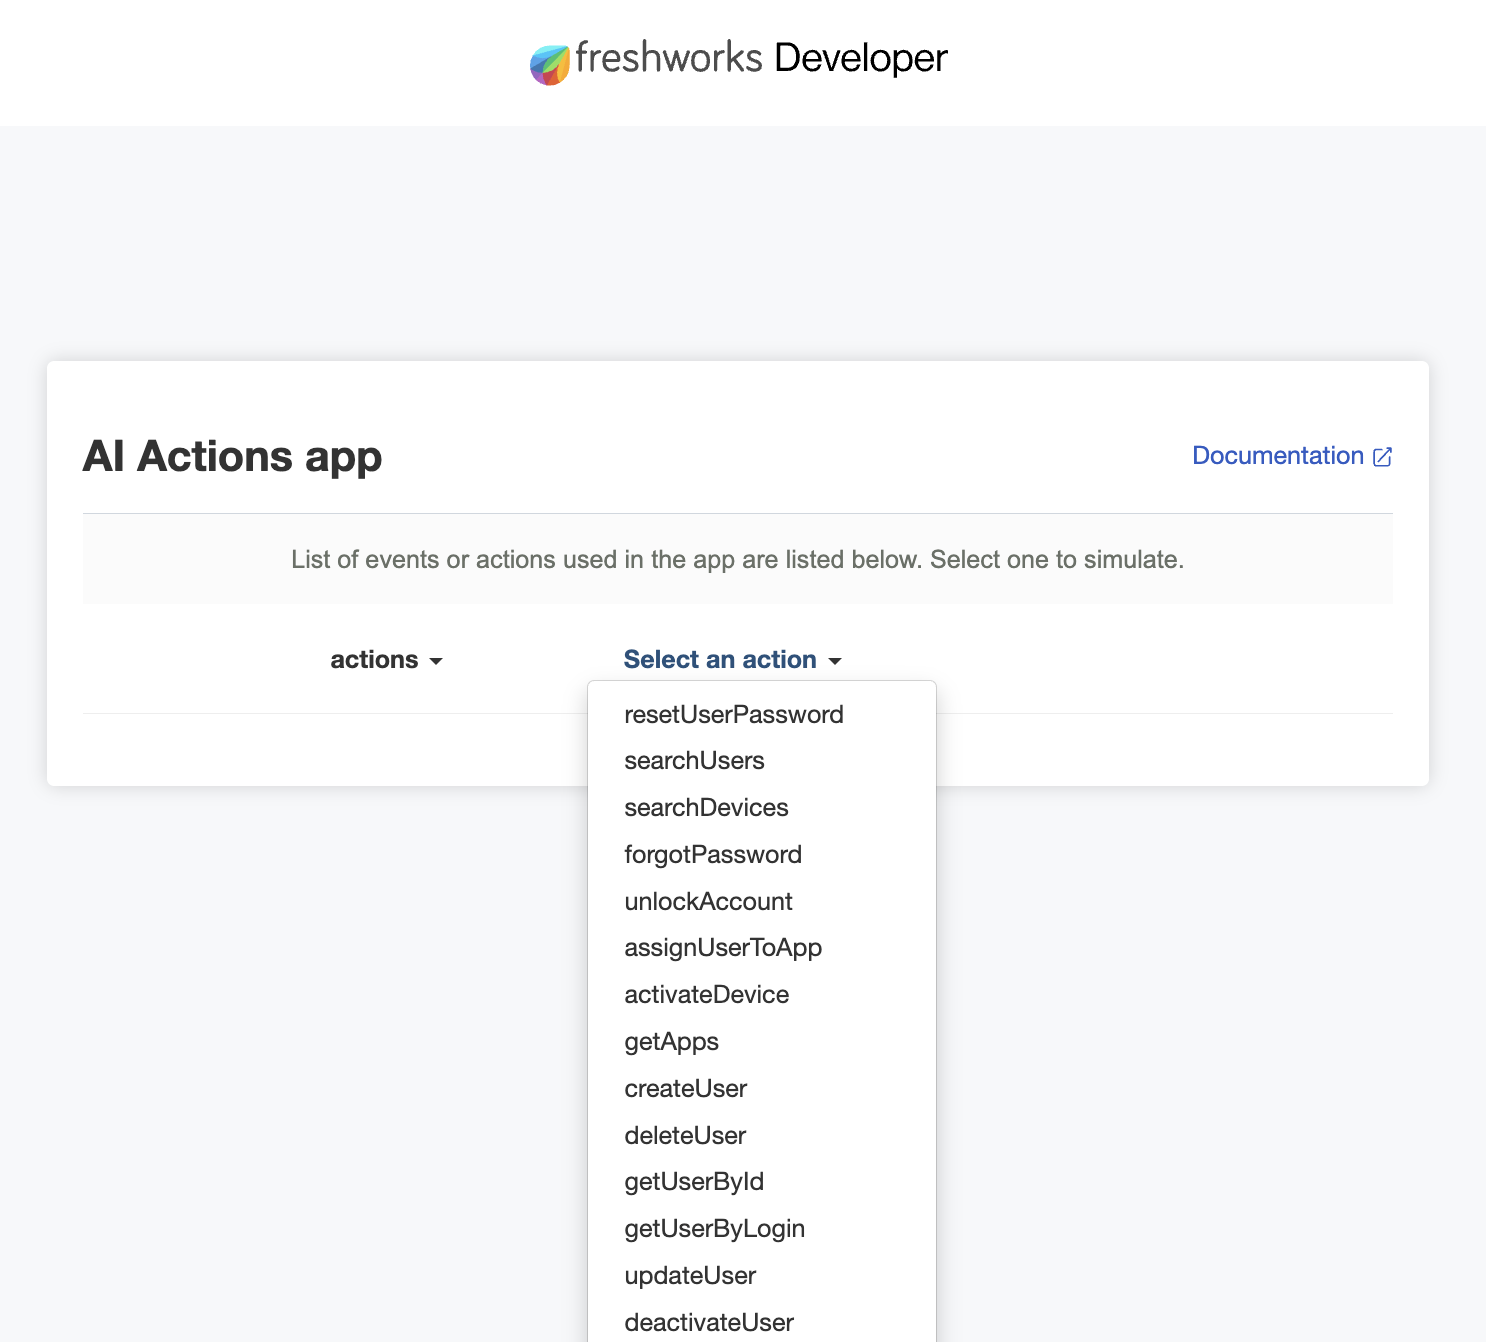 Local testing page
Select the action you want to simulate. The payload from server/test_data/<actionName>.json is displayed. To test a different scenario, edit the payload.
Click Simulate. If the action is simulated successfully, the Simulate button changes to Success. If simulation fails, the button changes to Failed. Check the terminal output and fix handler, template, iparam, or OAuth issues before you retry.
Confirm the response includes fields defined in the response schema in actions.json.
Validate and publish
Note:AI Actions apps can be published as Custom apps only. Freshworks (public) apps are not supported for AI Actions at this time.
From the app root directory, run fdk validate and fix any reported platform or lint errors.
Test each action locally as described in the previous section.
Run fdk pack to create the upload bundle.
Upload the packed app as a Custom app in the Developer Portal.
In Name your App, enter a name workflow admins should recognize in AI Agent Studio.
When the upload flow shows Where can this app's actions be used?, select AI Agent Studio.
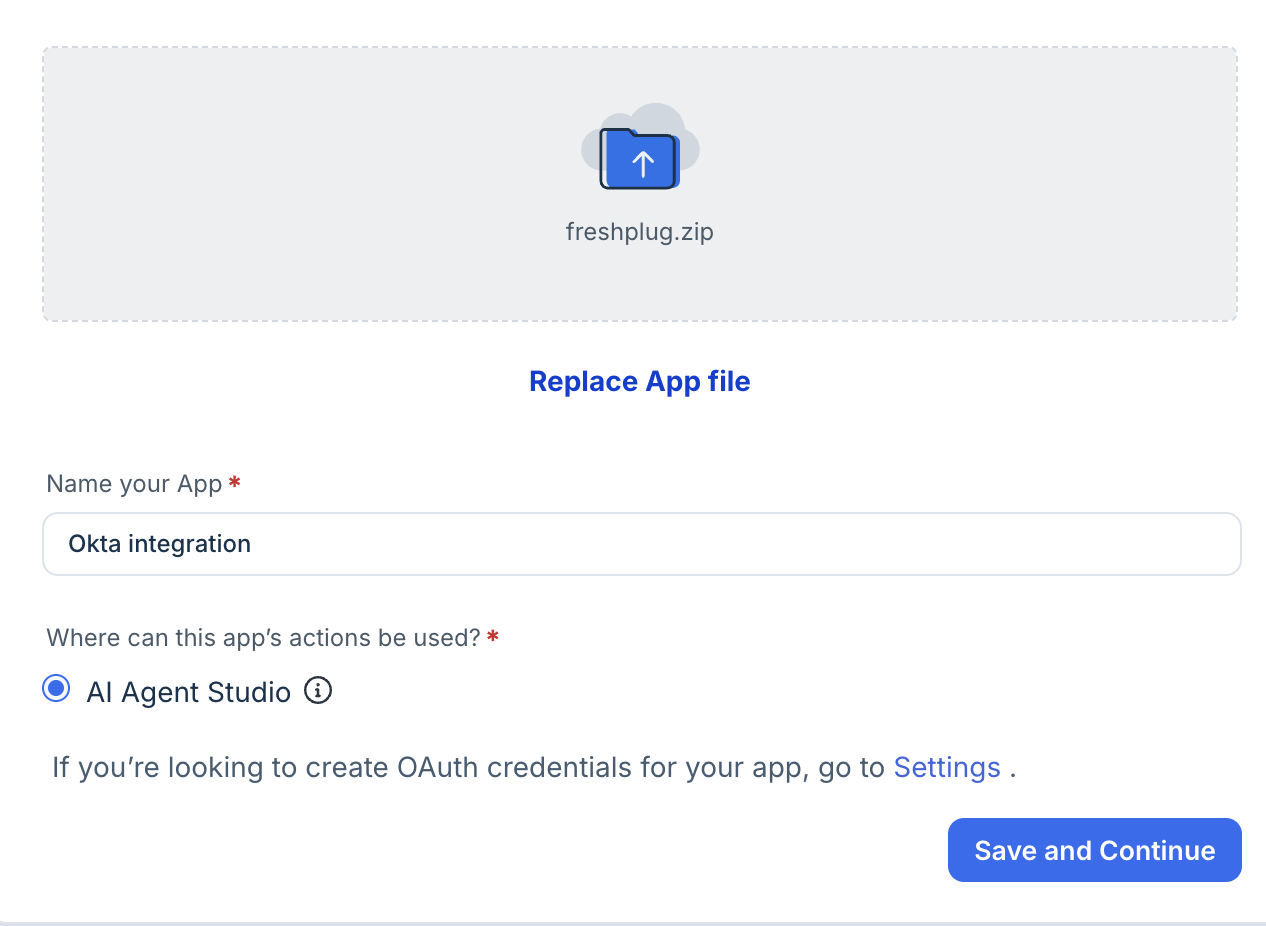 App Submission page
Click Save and Continue and complete the further steps to publish and install the app in a supported subscription.
After the app is installed in the account, continue with Use actions in AI Agent Studio to see how your actions appear in the live UI and validate them with Test API.